This is a tutorial for sewers of all skill levels who love quick and easy projects.
Handbags, purses, and totes can be expensive. If you love to change up your accessories without breaking the bank, homemade bags are a huge money saver. Plus, you can have something that is unique to show off your personal style. Making your own tote is an eco-friendly way of reducing plastic bag waste as well as using up scrap material leftover from other projects. Because this bag is reversible it is like making two bags in one sitting.
As long as you know how to thread and sew a straight line with your sewing machine you can make your own handbag using these instructions.
For these instructions, ring handles are used. Other alternatives are possible. Variations are shown at end of presentation.
Take one type of fabric and fold it in half or double it with the wrong sides facing out. Now draw the desired shape of your tote onto the fabric.
Cut through both layers so you have two pieces of the same kind of fabric.
Double the other type of fabric and lay one of the cut pieces on top. Pinning the cut layer to the uncut fabric to keep it from moving while cutting.
Zigzag stitch along all edges of single layers (4 different pieces) to prevent fraying of fabric.
To reinforce edges where the handles will be, turn under edge of fabric about ¼ inch starting at top of bag and continuing down about 2 - 3 inches (depending on size of bag.) Sew this in place with a straight stitch close to the edge. Repeat this step for both sides of all pieces of fabric.
Pin two matching pieces of fabric together with right sides facing each other.
Sew these together with a regular straight stitch. Start where the handle opening is on one side, follow the edge around and stop at the handle opening on opposite side.
This image shows where to start stitching bag closed. Don’t forget to have right sides together.
Make sure you leave opening along top straight edge. This is the opening of your handbag.
Lay one handle between top and bottom layer of one section.
Lay out your two sections with the tops of each facing each other. This is where you will sew in your handles.
Sew together the two sections by lining up the top edges.
Flip the bag over and repeat steps 8, 9 and 10, inserting second handle and keeping it in between the two layers.
Turn the bag right side out through the handle openings.
Tuck one side of bag into opposite side.
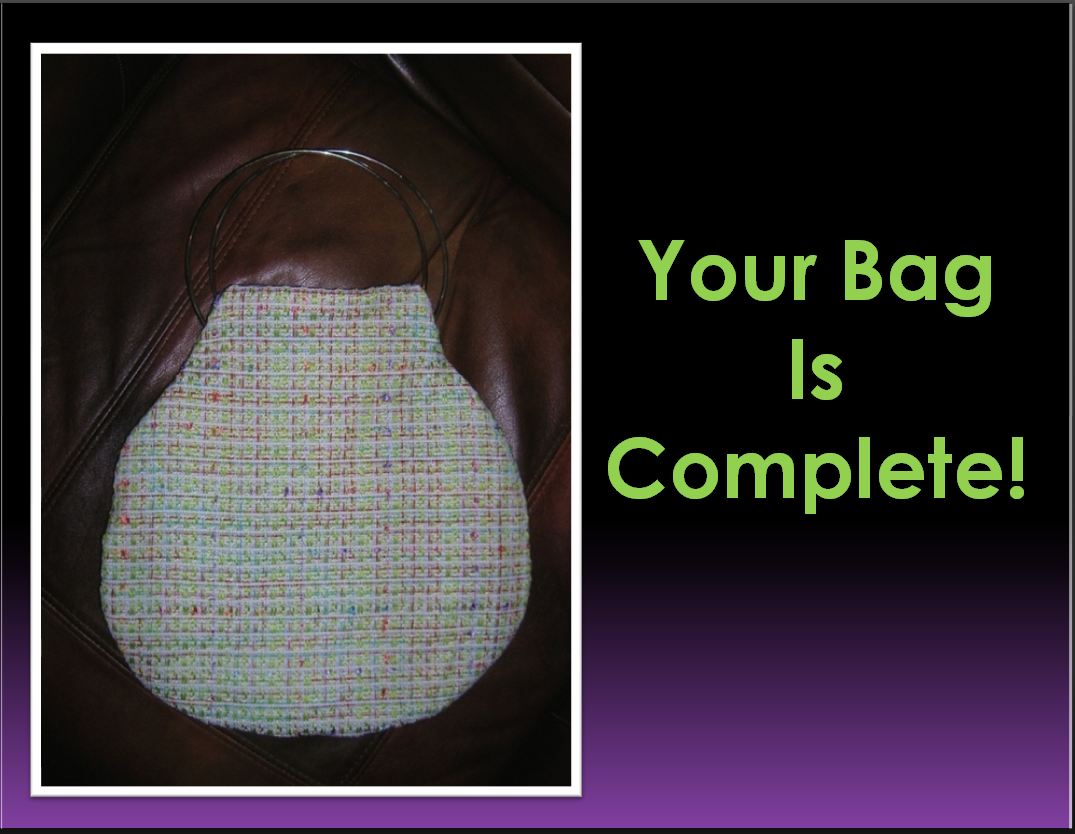
These make great personalized gifts.
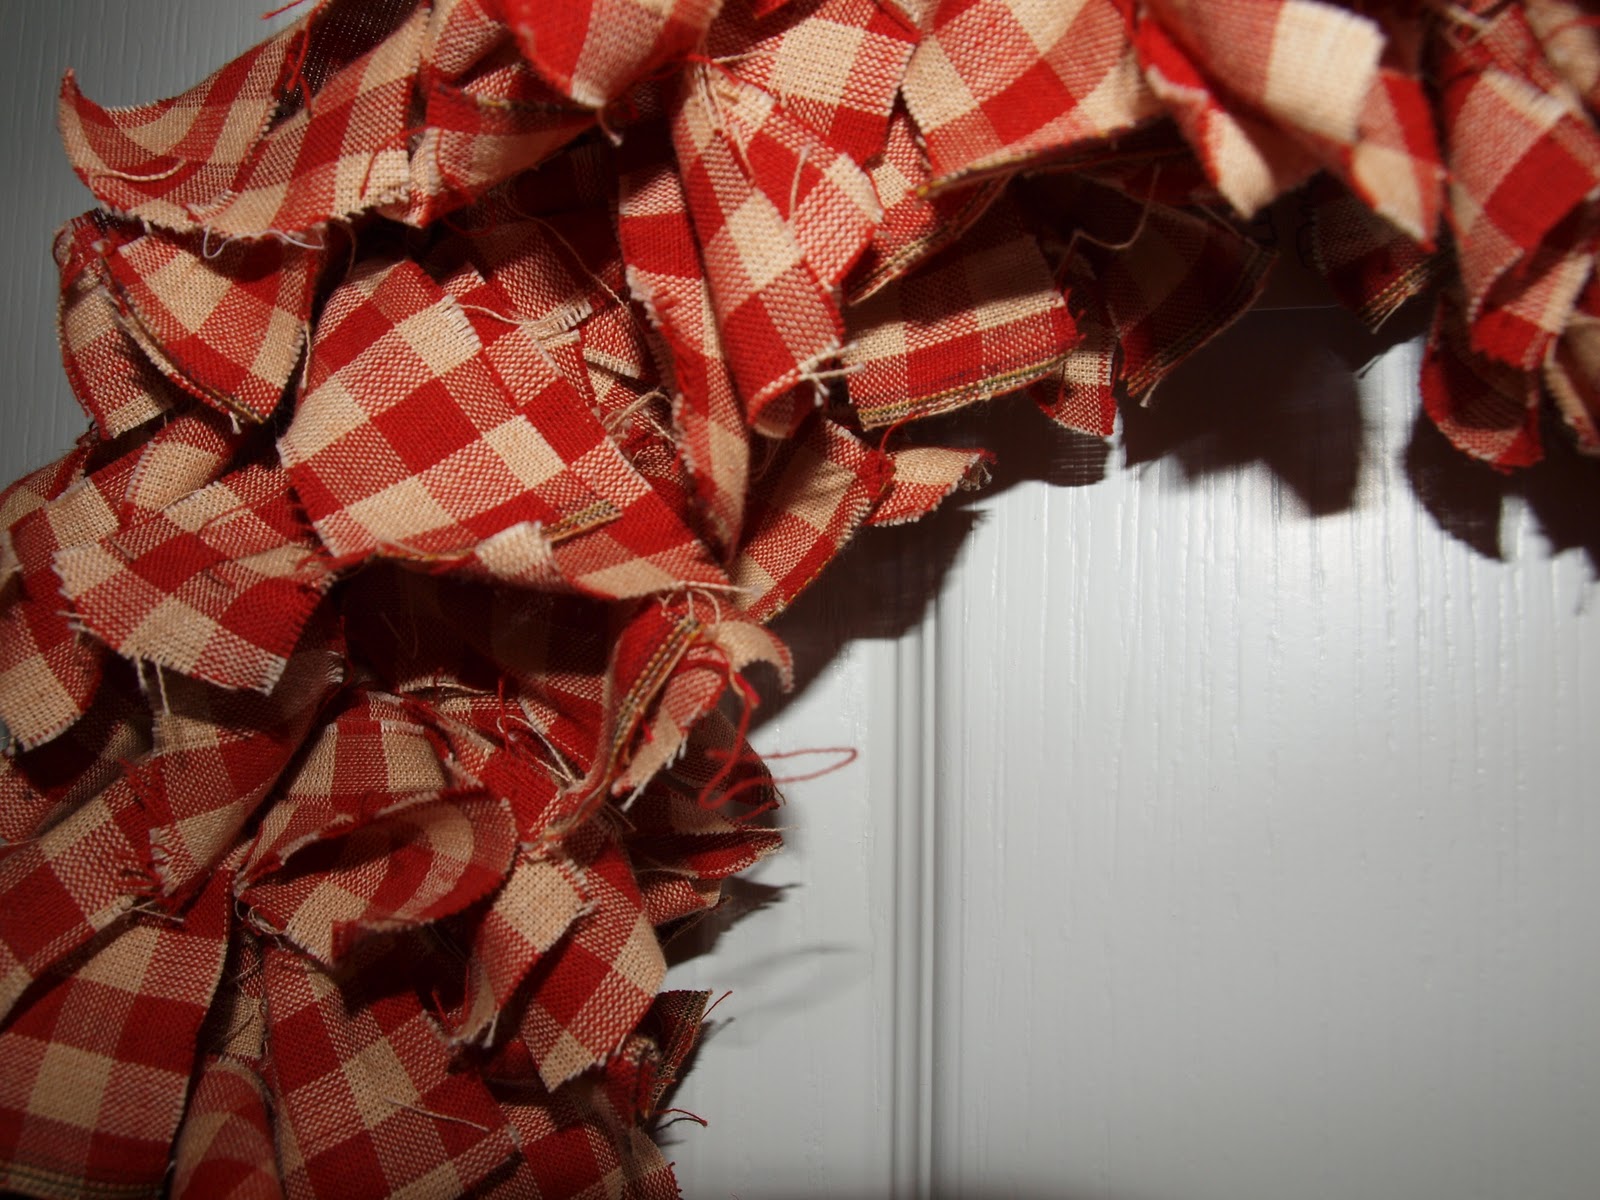
Decorative buttons, fringe, ribbon, or patches can be sewn to outside of bag to give a different look.
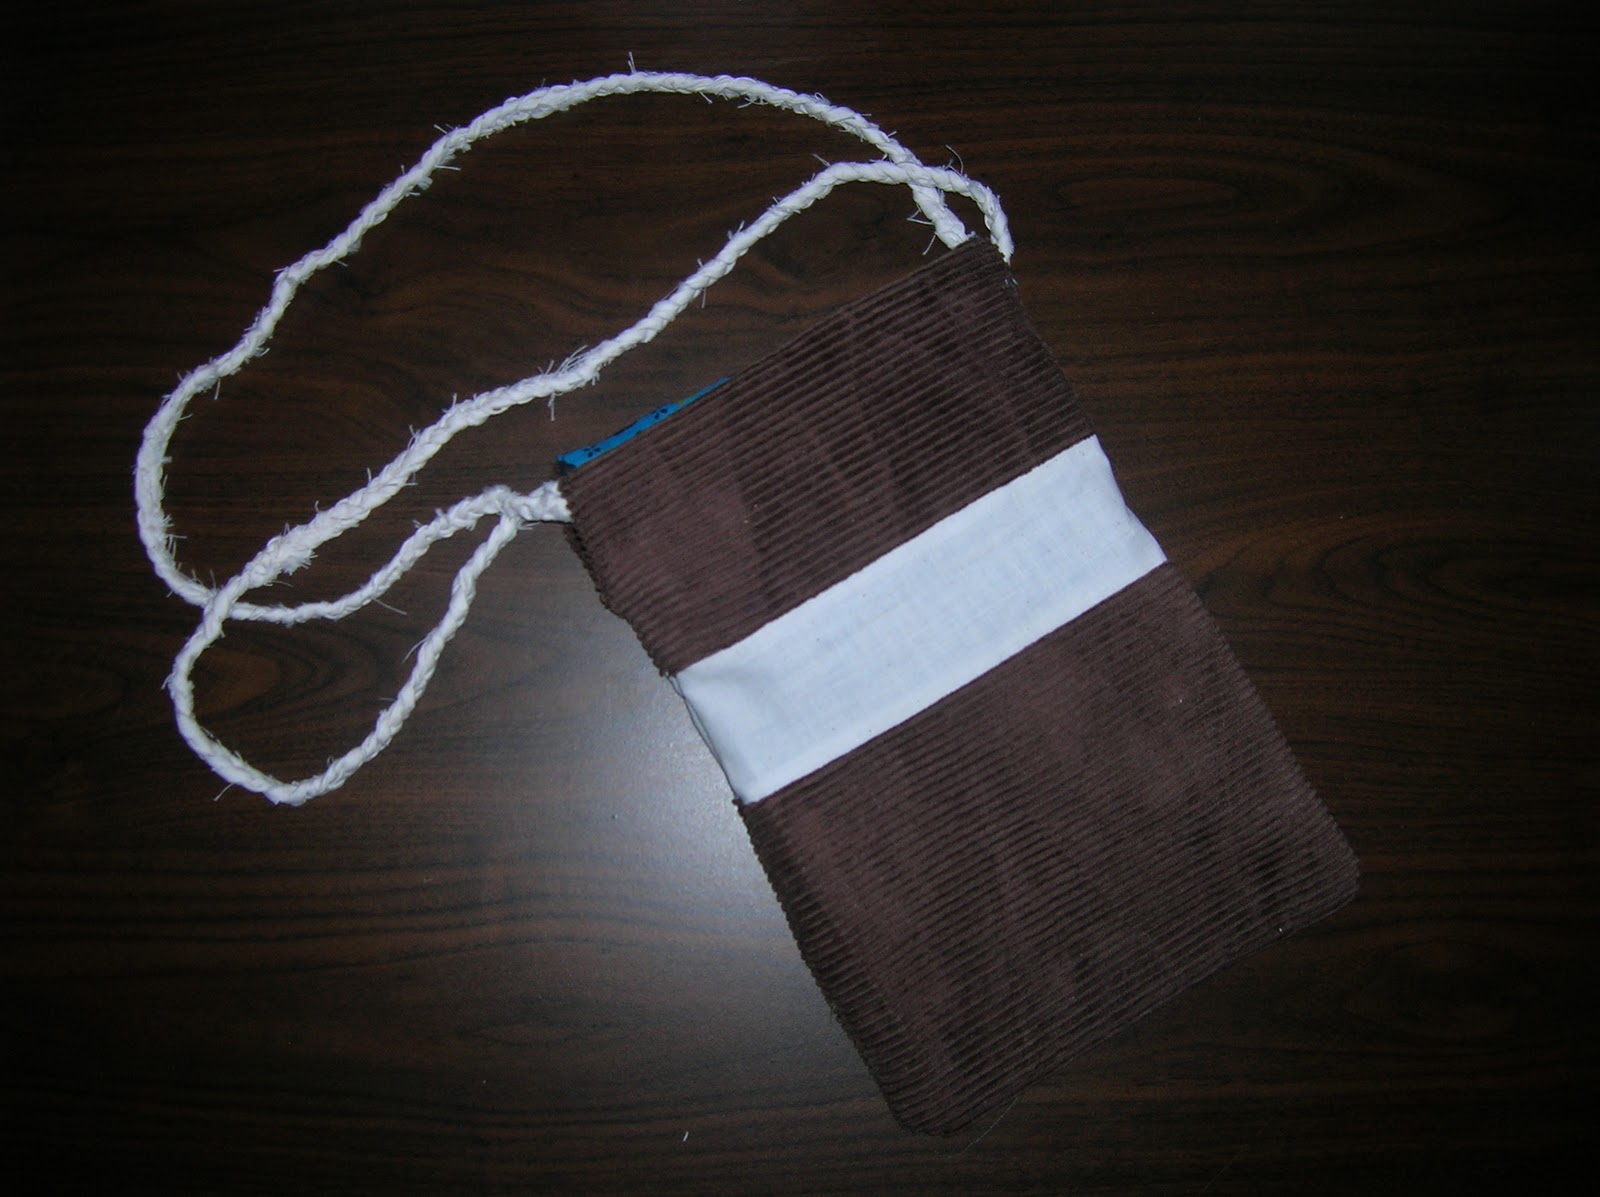
Changing the shape and size can make a dramatic change in the look of your tote as well.
Fabric can be selected to adapt to any occasion; tailgate tote, wedding bag, birthday bag, etc.
Here are some examples of adaptations made to this handbag.
This is a simple bag that can be done in no time. Once you get this down, you will be able to adapt the instructions to make many shapes and sizes which will add variety to your collection. Getting complements on your handbag will be even more satisfying when you can brag that you made it yourself.